This tart is the simplest dessert to make. It comes together in ten minutes and is guaranteed to be a crowd-pleaser. The no-bake crust is filled with a smooth and decadent chocolate ganache and topped with fresh raspberries (or other berries) on top. It is ideal to make this tart during mid-summer because that is when raspberries are in season. I purchased the ingredients for this recipe at Whole Foods and the raspberries at the Union Square Farmer’s Market. I adapted this recipe from Rachel Conners, who runs Bake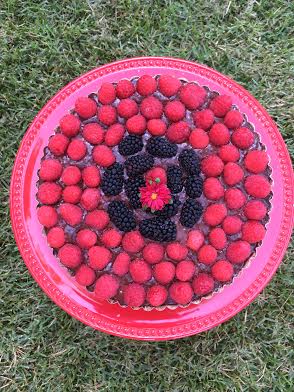 rita.com, where she shares her love of baking with the world. The majority of her recipes are gluten-free, refined sugar-free, and vegan, which is why I love them. Check out her site to learn more about her.
Here is the recipe:
For the crust:
1.) 1 and 1/2 cups almond flour
2.) 1/4 cup unsweetened cocoa powder
3.) 1/4 cup coconut oil (melted)
4.) 1 tablespoon pure maple syrup
5.) pinch of course sea salt
For the filling:
1.) 1/2 cup coconut milk
2.) 6 ounces bittersweet chocolate (chopped into small pieces)
3.) 1/4 cup raspberry preserves or raspberry jam
4.) 2 cups raspberries
Directions:
1.) Firstly, grease a 9-inch tart pan with a removable bottom with coconut oil or vegetable oil.
2.) In a medium-sized bowl, combine all of the ingredients for the crust: almond flour, unsweetened cocoa powder, coconut oil, pure maple syrup, and sea salt. Stir these ingredients together and press the mixture into the tart pan. Set this aside.
3.) Time to get started on my favorite part: the filling! Pour the coconut milk into a small saucepan and bring the liquid to a boil– make sure not to leave the coconut milk unattended at this point. Then, place the chocolate into the saucepan along with the raspberry preserves. Stir the ingredients until they resemble a creamy paste.
4.) Now, pour the filling into the crust and garnish the top with raspberries– feel free to get creative! Try assembling the raspberries into the shape of a heart or a smiley face. The possibilities are endless.
5.) Once you have garnished the top, place the tart into the refrigerator in order for it to set and become firm. You can leave it in there for 1-2 hours or overnight. After it sets, slice the tart and serve it to family and friends! Bon appétit! 🙂


